| WTI/Experiment Electronics/Data Processing: Go4 |
| Previous tutorial 6 | | Go4 | Example 7 | | Next tutorial 8 |
A much cleaner implementation would be to separate the two steps and have two processors.
Exactly that is provided by Go4 steps. Go4 steps are modular function units executed sequentially.
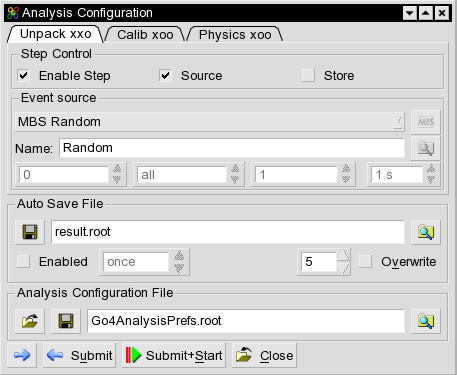
Each step has an event source, an event processor, and an event store. The setup of the steps
can be done in the GUI in the configuration window we already used (we had one step).
The standard setup of steps is that each step uses the output of the previous one as input.
Each step providing an output event can be enabled to store the output in a file.
Then the execution of this step can be disabled and the following step using this output as input
gets it from the file. The processor need not to know where the input event comes from.
The file I/O is done by the framework (see lecture).
> . go4loginNow the variable GO4SYS should point to the top Go4 directory. Copy the tarball tut07.tar from Example above into your directory and unpack it to your new directory:
> tar xvf tut07.tarAs before this should create a libGo4UserAnalysis.so library which is used by the standard Go4 analysis main program.
> . ./rename.sh XXX St3
> make all
| TSt3Analysis | setup.C |
| TSt3MakeUnp | TSt3EventUnp |
| TSt3MakeCal | TSt3EventCal |
| TSt3MakePhys | TSt3EventPhys |
| TSt3Param |
We have three steps: Unpack, calibrate and physics. Each step has a processor (Make) producing an output event (Event) which is then used by the next step as input. The first step uses the MBS input provided by Go4 as in the previous example. The table below shows the setup as it is done in the setup file.
| Step | Input | Processor | Output |
| Unpack | MBS | MakeUnp | EventUnp |
| Calib | EventUnp | MakeCal | EventCal |
| Physics | EventCal | MakePhys | EventPhys |
We moved the step creation from TSt3Analysis.cxx into setup.C.
> go4analysis -events 100000The output shows in detail what happens like in the previous examples. After having processed the 100000 events, the program terminates and has produced a root file which we now inspect using the Go4 browser.
If you look into the folders you will see subfolders for the steps:

> go4analysis -name MyAnalysis -prefs Go4AnalysisPrefs.root -events 100000where MyAnalysis is the name (default) as specified in the launch panel and Go4AnalysisPrefs.root the file name (default) specified in the configuration panel. When launched by GUI we have to use the restore button as described above. In both cases the configurations are made from the same files. The setup macro is only the default or starter setup, as long as we have no other.
An alternative would be to use only different macros (pass macro name to analysis program) which works also in GUI controlled mode.
> go4analysis -events 100000 -x abcThe arguments behind -x (separated by spaces) are passed to TSt3Analysis.cxx as string vector (alternatively the argument list can be specified in the analysis launch panel of the GUI, see Tutorial 2). There they can be accessed like
if(argc > 1) cout << argv[1] << endl;This mechanism could be used to specify from command line or launch panel an input file name and pass it as argument to setup.C where it can be used to compose all other file names. Then all files of a run can be identified by that name.
void setup(char * name){
....
TString TSauto = Form("%s_AS.root", name);
TString TSlmd = Form("%s.lmd", name);
TString TStree = Form("%s_tree.root", name);
TString TSnode = Form("%s", name);
go4->SetAutoSaveFile(TSauto.Data());