DECstation 2100 specific notes


This is a funny box, the low end of the DEC Mips line.
Got it from another collector who dissolved his garage collection of old hardware.
Originally it served at the Cap Gemini software house, apparently.
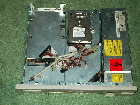
It came with a very small (RZ23,100MB) disk, obviously it was used in a "diskless" mode,
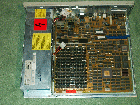
booting from some server. I managed to spot some of those rare 2MB RAM modules
overseas (B.Myers), so now this machine runs on a whopping 24MB of RAM.
My DS2100 came w/o gfx board, so I had to run it in console mode first.
However, a kind soul, W.Rupp from Austria,
provided me with a spare VFB02 graphics module.
Now the box runs with 1024x768x8 graphics, hoorray !
Another issue was the battery.
It consists of three 1.2V NiCd cells, which died of age and leaked onto the mobo.
I carefully cleaned the board and replaced the battery with fresh NiCd cells.
Apparently there was only little damage done, the machine works flawlessly so far.
One might ask why so much fuss for an antique like this.
Well, must be nostalgia. Back in the good old times, around 1990,
my colleagues had a few of these boxes at work, serving as as replacement
for expensive VAXstations and/or X-terminals.
According to some measurements
with a number crunching program we used back then,
it beats most of the VAXen (except the VS3176), at a fraction of their price.
Pixx


Console commands
Use
test -c                         # to query configuration.
boot   -f       rz(0,0,0)vmunix # boot from SCSI ID=0
setenv bootpath rz(0,1,0)vmunix # set boot path to ID=1
Consoles on the DECstation 2100 and 3100 machines
To set up a serial console, the keyboard and framebuffer need to be removed. Leave the mouse or a suitable mouse terminator (DEC part no. 12-25628-01) connected to the system. A quick terminator can be made by shorting pins 2 (Tx) and 4 (Rx):
            top of unit
               _____
              (     )
             ( o o o )
            (         )
           | o ||||| o | <--  Connect these two pins together
            (         )
             (  o o  )
              (_____)
                ^
                |

    (As seen from the rear of the system unit)
The framebuffer is the single, fairly large memory board on the left-hand side of the mainboard, behind the system RAM.
Connect a null-modem cable from the printer serial port (marked with a printer icon). The serial ports are actually RS-423, but a compatible RS-232 style cable can be made. The console port settings are 9600,n,8,1 as usual.
(From
NetBSD.org
)
Bootable CD-ROM
Boots from RRD40 without problems:
boot -f rz(0,4,0)vmunix
to boot ULTRIX from CD-ROM at SCSI ID=4.
After installation
setenv bootpath rz(0,0,0)vmunix
auto
for a system disk at SCSI ID=0.
Last updated: 2-Aug-2008,
M.Kraemer


