Go4 for the FRS
This page was written by Helmut Weick, 22nd
April 2013,
contact h.weick(at)gsi.de,
Imprint (Impressum),
Privacy Policy (Datenschutzerklärung)
Since more than 10 years Go4 is used for the online and as offline
analysis. Many histograms, pictures, conditions exist for plotting and computing up to the fragment identification.
The FRS Go4 analysis program was written by Sergej Linev from GSI.
A good starting point you can find in the last similar experiment.
Do not edit this but make a copy for a new experiment.
Start the Go4 analysis
Go4 runs on LINUX, for online use
at best a local machine in the FRS Messhütte (e.g. lxg1032)
otherwise lxi0xx machines also work but watch for different root library versions.
For online analysis we use the profi account. Each
experiment should use its own directory with its own version of the analysis program
compiled for this run.
- Login as profi
(password ask FRS expert)
>ssh -X profi@lxg1032
- Create a new
directory if necessary, get files from FRS standard
>mkdir sxxx
>cd sxxx
>cp /u/profi/Go4/FRS-std/* .
- >go4
(start Go4)
The main Go4 window will appear.
(Shell settings for
Go4 already defined at login for profi)
>. go4login pro
After editing the source code (files *.cxx, *.h) if necessary
>make (creates a new FRS analysis program for Go4)
in case of problems delete old Auto save file (*ASF*)
- Launch an analysis client, click
 in the menu bar.
"Start Client" window opens, change directory if needed and press [Start]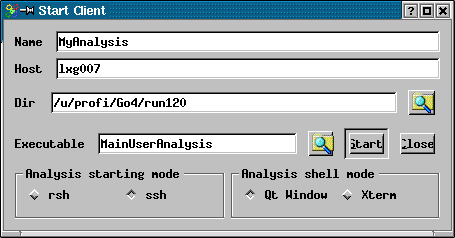
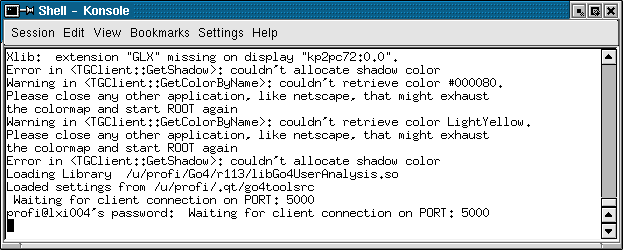
- enter password again in terminal window (not necessary one same machine)
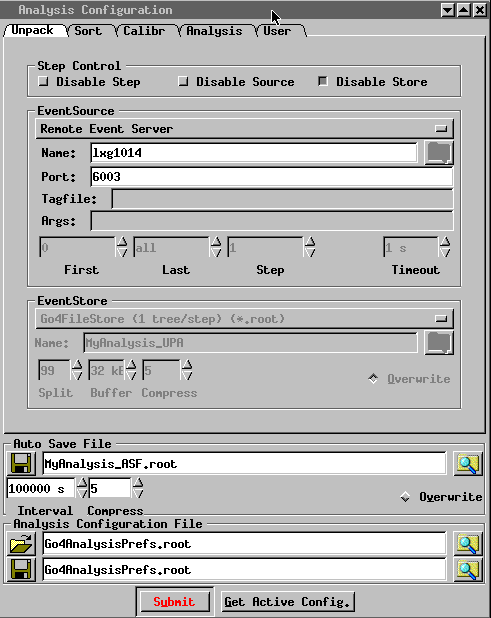
- Select data source for analysis:
remote event server, computer name where it's running and port number,
(online)
or option MBS file, and filename (offline).
click [submit]
- Start analysis
click  and
and
watch event rate at the bottom of the Go4 window.

Display a histogram
Create a new view panel, click
 .
.
Select a histogram to display from the analysis list and drag it with the
mouse to the empty panel. The histogram should appear.
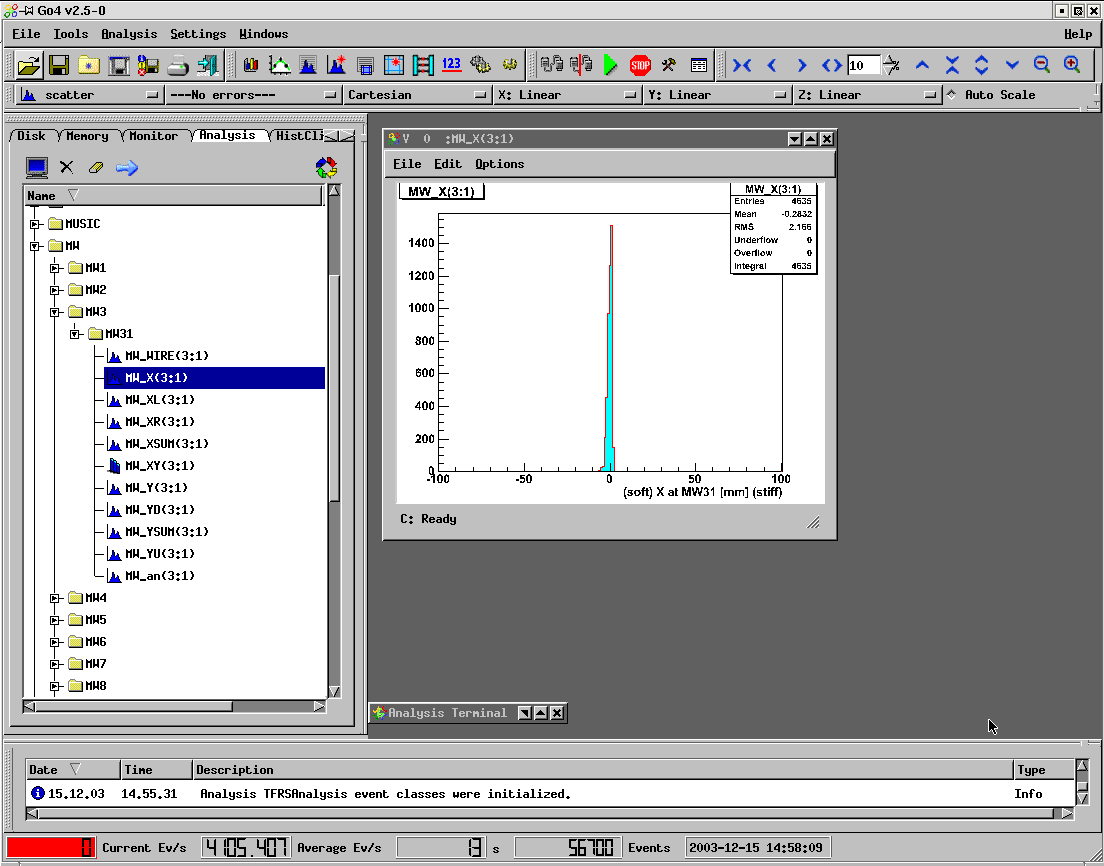
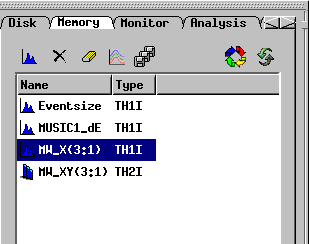
After doing this the name of the histogram will be in the memory list. Next
time you can simply recreate it by a double click on the name in the memory
list, or update it by marking it and pressing the update button
 .
.
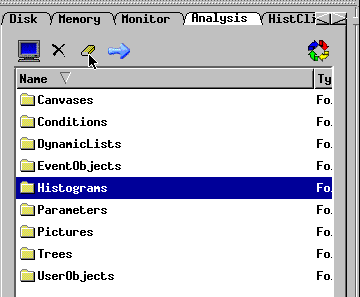
Set conditions
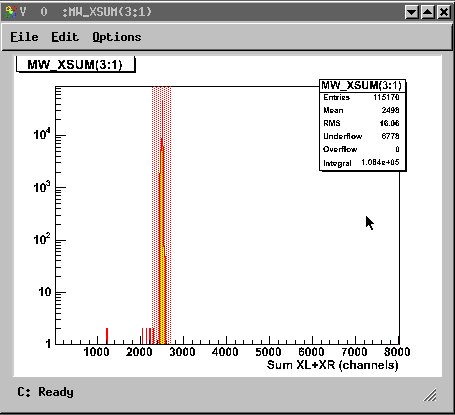
Example MWPC sum condition:
The delay times left+right or up+down should be a constant for each
MWPC. A condition on this is used to reduce
background.
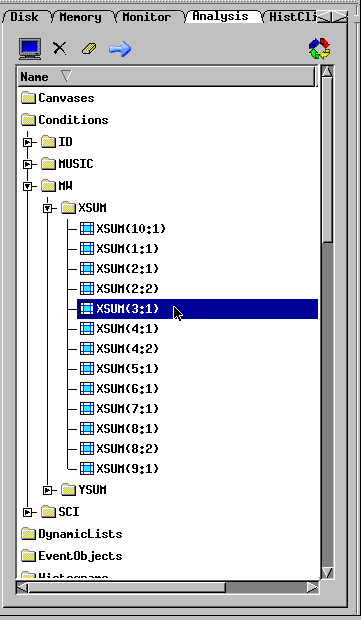
First display the histogram on which to put a condition, here MW_XSUM(3:1).
Then select the corresponding condition from the analysis list.
Some conditions are bound to certain histograms. In this case a double click on
the condition will display the histogram automatically.
The "Condition Editor" window will open, display condition on current view
panel pad, click .
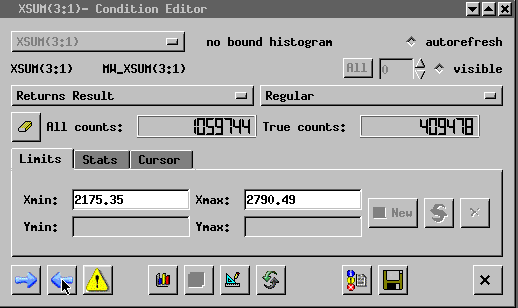
Adjust condition by shifting and stretching the red area.
Click left arrow in "Condition Editor" window to make changes valid for the
analysis program.

Clear histogram
Mark the histogram name or the whole folder in the analysis list and click on
the eraser button
When the histogram is also in the memory you will see the result after an
update.
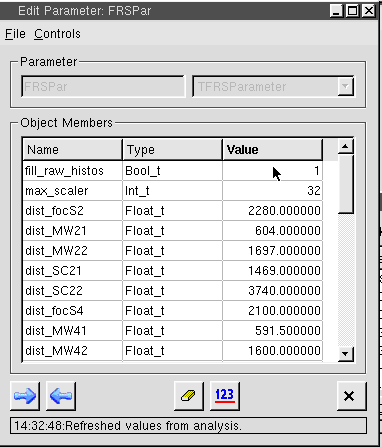
Change parameters
To change parameters (distances, Brhos, offsets and other calibration
factors) edit the file setup.C. It will be executed when starting the
acquisition with the special button
 .
.
Otherwise you can run it
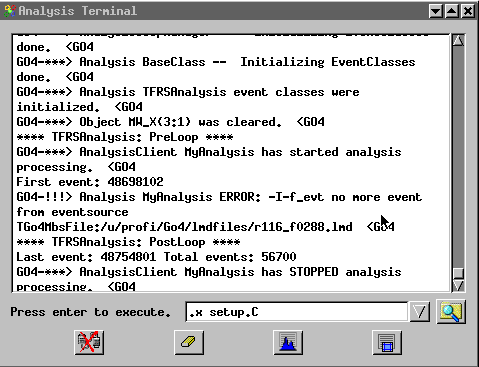
in the "Analysis Terminal" window. Type ".x setup.C" + [return]
Display all raw data
Some raw data are already assigned to special histograms. But to avoid to
much computation the histograms for all raw VME data are switched off. To switch
them on again:
- Load library (click
 in the menu bar),
select "Load new library",
choose file "libGo4userAnalysis.so".
in the menu bar),
select "Load new library",
choose file "libGo4userAnalysis.so".
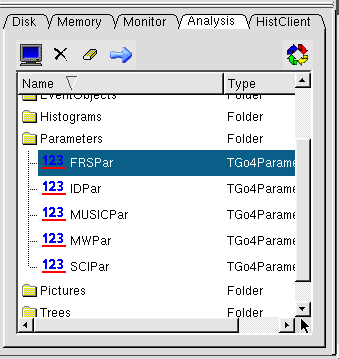
- Select "Parameters", "FRSPar" from the analysis tool bar.
Enter value "1" in line "fill_raw_histos", press [return] and send to the
analysis program  .
.
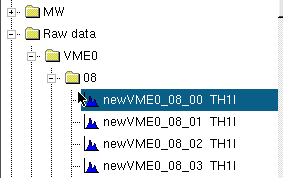
- In the analysis tool bar you will see a new subfolder of "Raw data" named
"VME0", select one of the channels to view as a histogram.
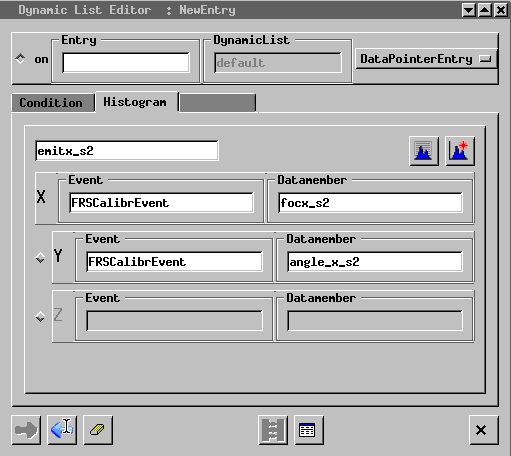
Combine data to new histograms
This uses the dynamic list editor feature of Go4. It is good for simple
histograms but allows to gate the histogram by maximal one condition. Only data
already in the Go4 analysis can be used and no calculations can be done.
Start the dynamic list editor
 from the Go4 menu bar.
In the "Dynamic List Editor" window click
 to create a new
histogram.
to create a new
histogram.
The following entries are for an example of a two dimensional histogram with
100 x 100 bins and axis going from -100 to +100 in x and y direction. The type
is I and the histogram is named emitx_s2.

Click [create remote] to add this histogram to the list of histograms in the
analysis. Where you will see the new entry.
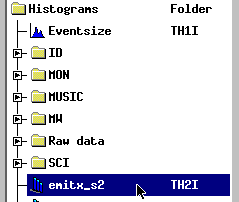
To fill the histogram you can use the existing analysis events. The name of
the event and the datamember can be chosen from the list of event objects in the
analysis tree. Just click on the name and drag it into the empty text box. Then
use the blue arrow button to submit the changes to the analysis.
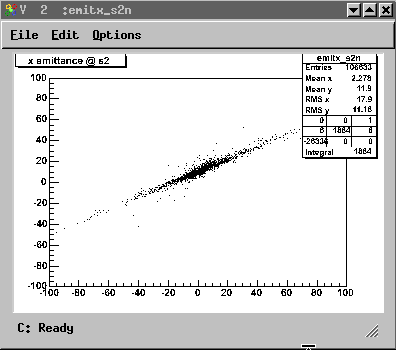
The final result when displaying the histogram in the example looks like this
Starting the DAQ
Data are read out from the VME modules by a program (MBS) running on the RIO
processor (R3-11 and others) in the VME crates. These send data to the event builder,
running on a LYNX-PC (X86-13). The events are distributed via a remote server
program running on a LINUX PC. Go4 connects to this remote event server.
How to start the MBS (GSI multi branch readout system):
>telnet x86-13, login as profi, for
password as FRS expert
profi>cd /frs/usr/profi/mbsrun/sxxx
profi>resa (wait, to clear old connections)
profi>net600
(repeat, until no connections are shown anymore)
profi>prm
(start MBS prompt)
r3-8>@startup
(macro to start a lot of processes)
x86-11>type event -v (shows content of one event)
x86-11>sho rate
(shows rate for diagnostics)
x86-11>set dispatcher r3-11 (switches to RIO processor if you like)
r3-8>set dispatcher x86-13 (switches to event builder PC again)
How to stop the MBS
x86-11>set dispatch r3-11
r3-8>stop acq
r3-8>@shutdown
r3-8>exit
To write files to disk on x86-13:
x86-11>open file sxxx-067.lmd -disk (write file to local disk,
but this is limited in space !)
better use:
start server to accept lmd files on some computer with large disk, e.g. on
lxg1031
with access to the FRS data disk, /d/frs03/profi/sxxx/lmd
profi> rawDispRFIO
x86-11>connect rfio lxg1031 -disk (connects to
server from MBS)
x86-11>open file /d/frs03/profi/sxxx/lmd/run1xx_f -auto size=100 -rfio
(opens file on data disk, with automatic file numbering and a new file will be opened after 100MB )
x86-11>show file
(gives information about file)
x86-11>close file
x86-11>disconnect rfio
(after the experiment)
How to start the remote event server:
login as profi on some LINUX PC (e.g. lxg1031)
>mrevserv x86-13 (connects to event builder PC x86-13)
How to modify the analysis:
The source code of the analysis program is in the subdirectory ~/vme_frs_branch. The
main part is the f_user.c file. Use "make" to compile and then copy the
executable (m_read_meb) to the sxxx directory. A standard FRS analysis is the directory on r3-11
/usr/profi/mbsrun/frs-std .
The directory is also mounted on LINUX (user profi on lxi machines) as
/lynx/Lynx/frs/usr/profi/mbsrun/sxxx . This should make editing easier.
How to start the time module (TITRIS):
Time information comes from a time stamp module, which has to be initialized
and started. After a reset of the VME crate the settings are lost. Nik Kurz has
a program to initialize and test the module.
Login on r3-11 as profi, for password ask FRS-expert
>cd /nfs/groups/daq/usr/kurz/mbstest/rising/time_stamp_module/handling
>ts_mod_RIO3 -m (to set as master)
>ts_mod_RIO3 -g (to start clock)
>ts_mod_RIO3 -t (to show time stamp)
Calibration and Identification
The FRS detectors measure velocity via time-of-flight, charge via
energy-deposition in an ionization chamber, and magnetic rigidity by position.
From this the atomic number (Z) and the mass to charge ratio (A/Q) can be deduced. These
detectors have to be calibrated first. The detailed procedure is described in
the instruction how to set up the FRS.
Structure of Analysis Program
For each experiment a specific Go4 analysis program exists. Details can vary but the part
on FRS standard detectors stays.
The analysis proceeds in 5 steps:
Unpacking (Unpack)- read lmd file and store data in array vme[][]
Sorting (Sort) - assign detector specific names to the variables
Calibration (Calibr) - do first calibration, mainly for MWPCs and TPCs
Analysis (Anl) - Particle Identification (MUSIC, ToF, beta, Brho, Z, A/q)
User part (User) - user specific detectors
For each step exist a TFRS***Proc.cxx which includes the code for analysis.
The TFRS***Event.cxx defines the data structure in each step. Data from the previous steps can be
inherited to the following steps. TFRSAnalysis.cxx combines the steps and additional parameters for
calibration are provided in TFRSParameter.cxx.
These parameters can also be set during run time by executing the script "setup.C". That is the usual way of
changing calibrations.
In each step first histograms are created using root histogram classes (MakeH1, MakeH2).
Then after computations these are filled in the loop over all events, Fill().
Also conditions are defined MakeWindowCond(), that are used and checked later in the code,
usually in form of a Boolean type variable with name similar to the original data just inserting a "_b_".
The event structure defined in the TFRS***Event.cxx can be filled into a root tree for further analysis in root.
The analysis is programmed in C++. For compilation first set the path to the other go4 libraries (. go4login).
Everything is compiled and linked by executing the "Makefile". Older versions create a "MainUserAnalysis" program,
newer versions the same in form of a shared library "libGo4UserAnalysis.so". Each *.cxx has a corresponding
header file *.h for variable declaration and the object files are *.d.
Note, library versions (for root and others) on lxi and local lxg computers can vary, then you need to clean
and recompile.
For more information like histograms in the Monitor and Fitting
have a look at the general
Go4 manual.